Set up bridGe on your form
Seven steps, from installing the add-on to your first paid response. Have your Paybill, Till or bank details ready.
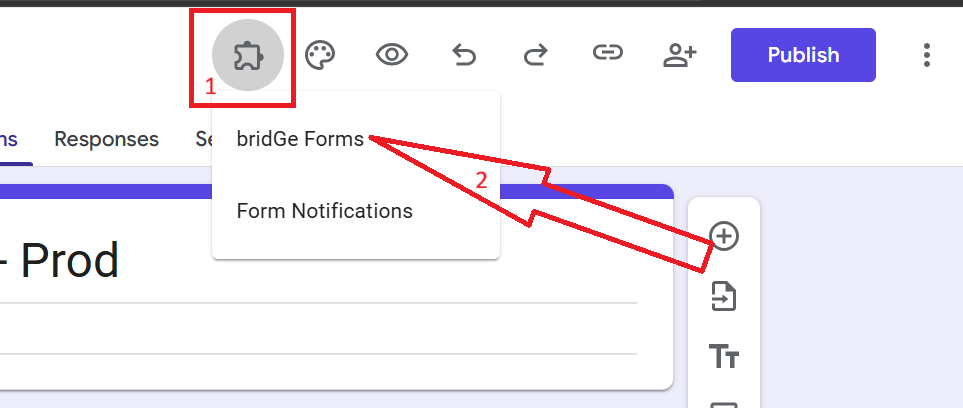
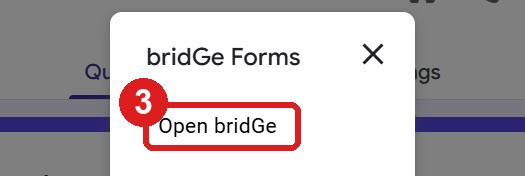
You can reopen bridGe from any Google Form through the Add-ons icon (the puzzle piece), then bridGe Forms, then Open bridGe.
- Step 01
Install bridGe
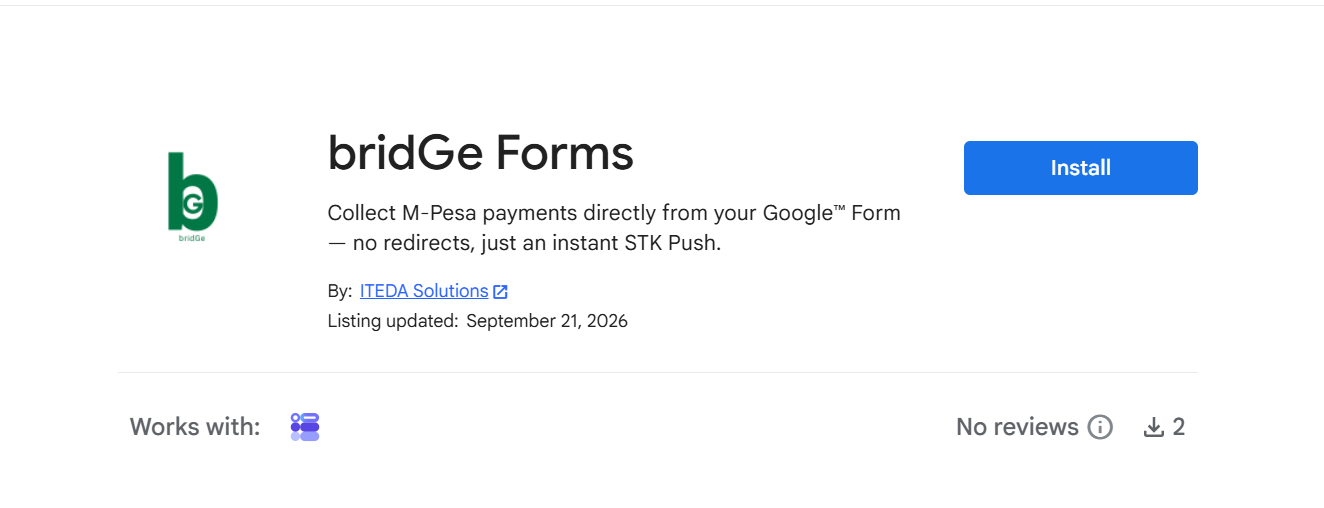
Open bridGe on the Google Workspace Marketplace and install it with the Google account that owns your form. Open the Marketplace listing (opens in a new tab)
- Step 02
Open bridGe and set up your form
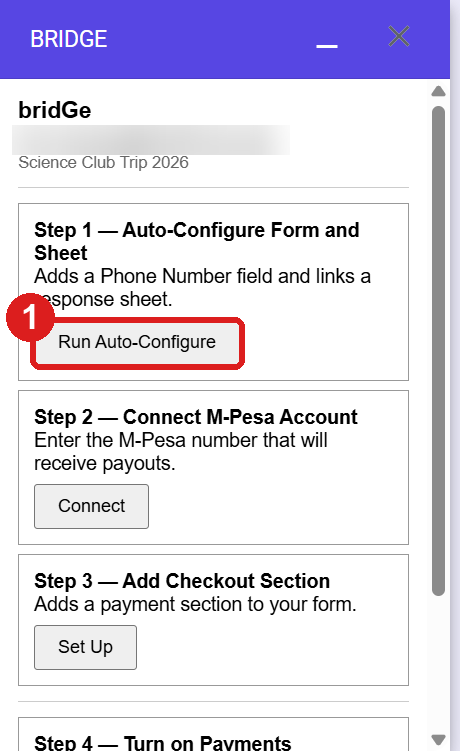
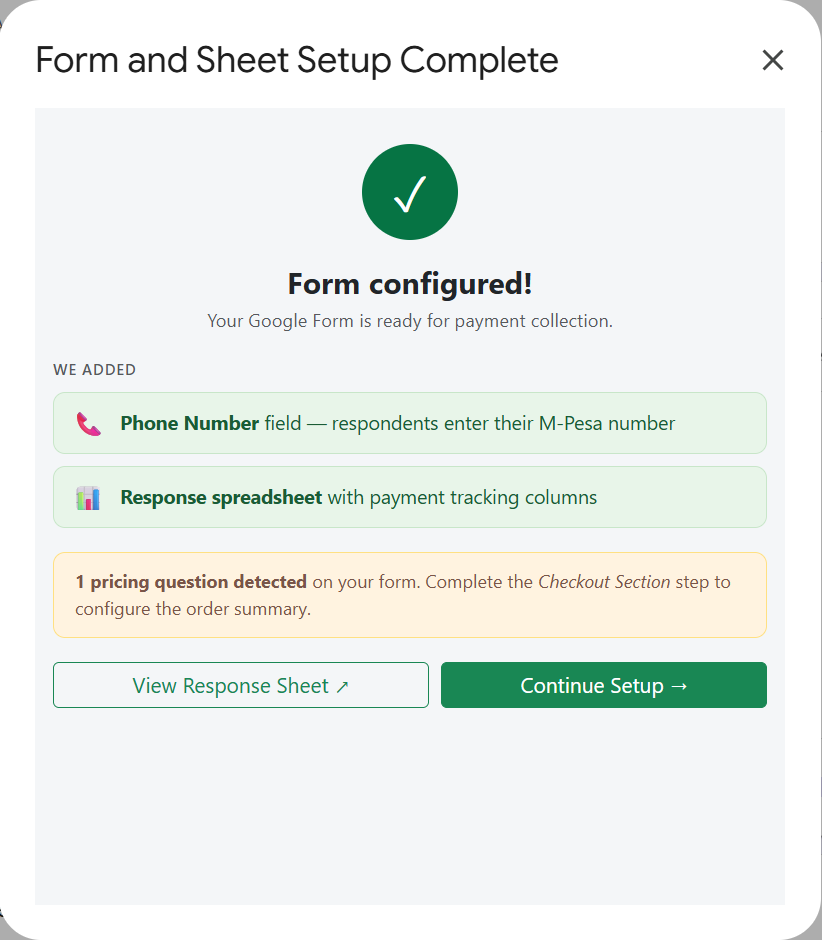
Open your Google Form, click the Add-ons icon (the puzzle piece) at the top, choose bridGe Forms, then Open bridGe. In the bridGe panel, click Run Auto-Configure. bridGe adds a Phone Number question to your form and links a response sheet with the payment columns it needs, such as the total, the payment status and the M-Pesa receipt.
- Step 03
Choose how you get paid
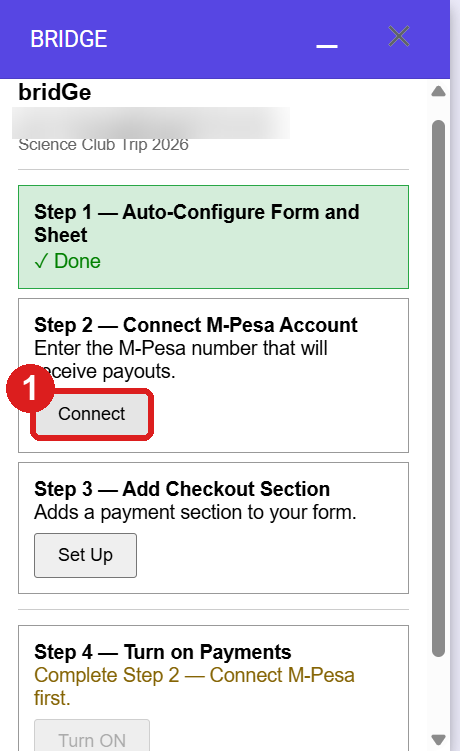
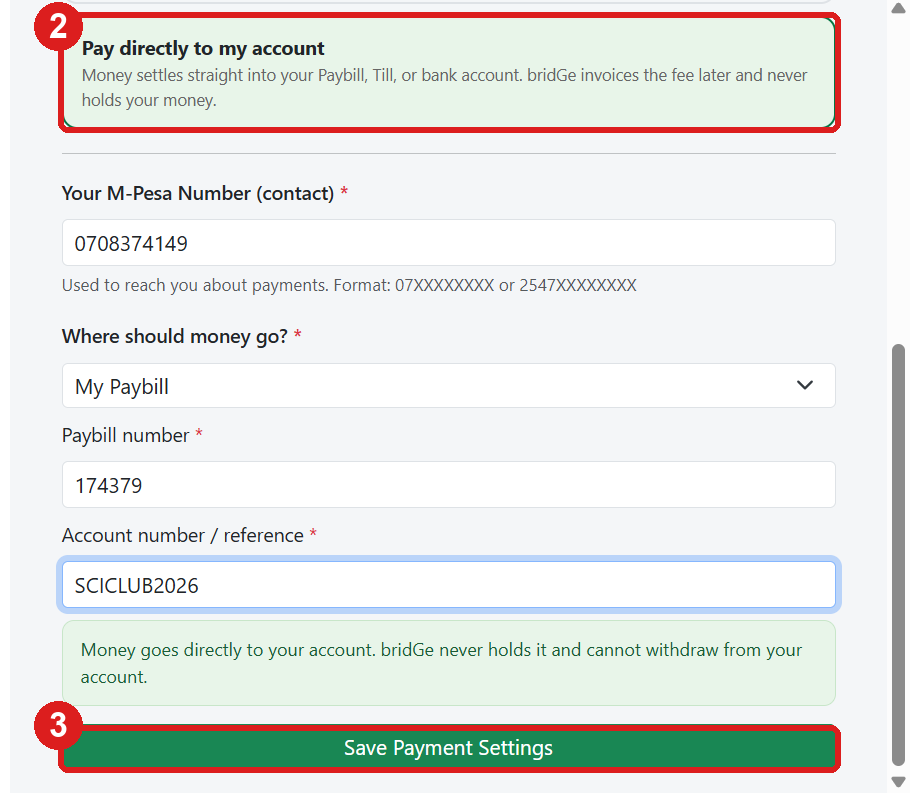
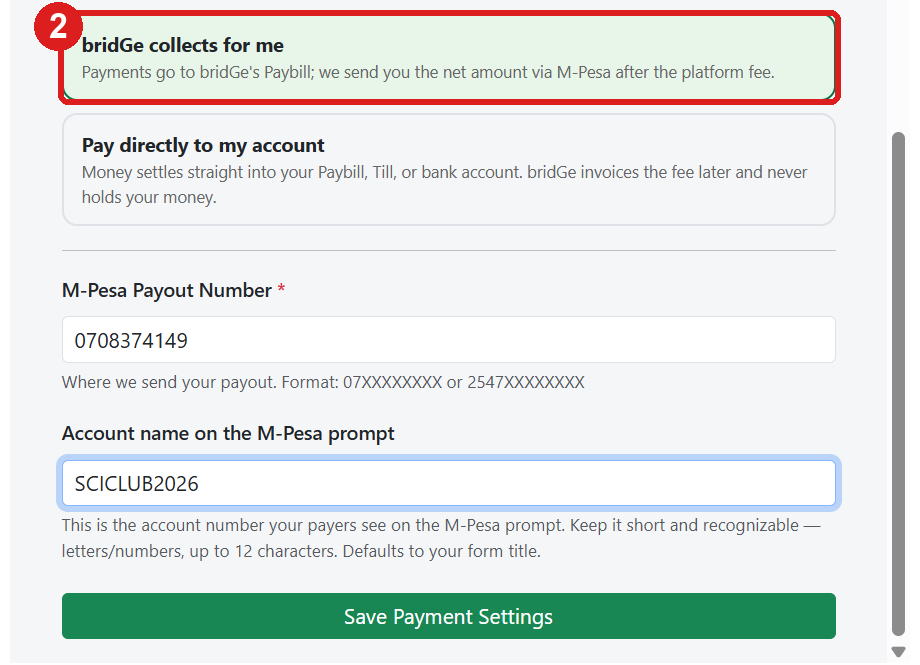
In the bridGe panel, click Connect. Choose Pay directly to my account (Direct) to send money to your own Paybill, Till or bank account, or bridGe collects for me (Managed) to let bridGe collect it and send the rest to your M-Pesa number after the fee. Fill in the details and click Save Payment Settings. Come back here any time to change where the money goes.
- Step 04
Add prices and the checkout section
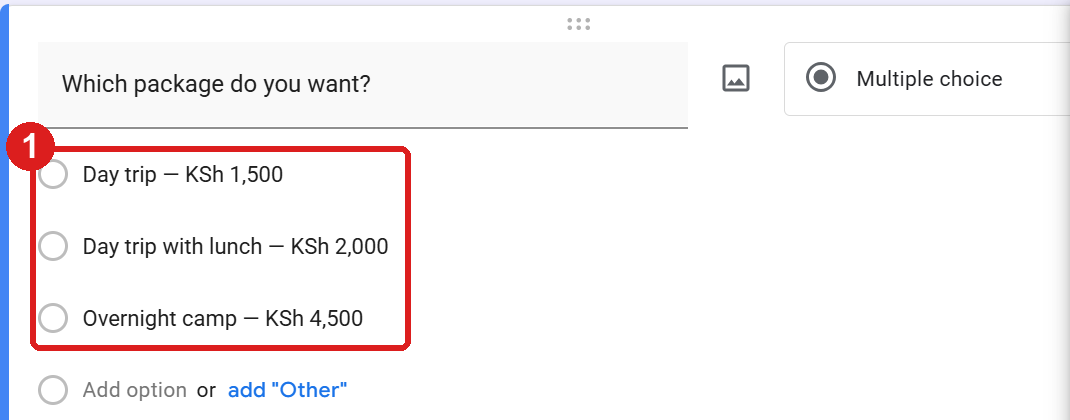
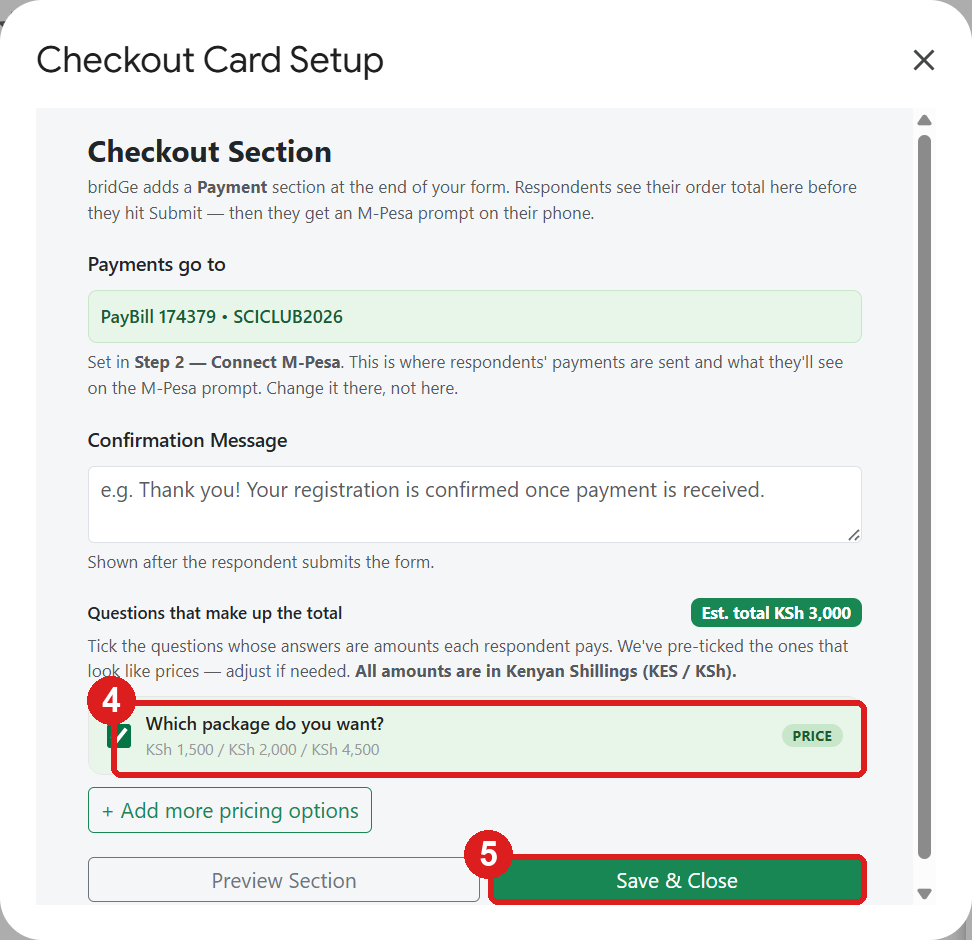
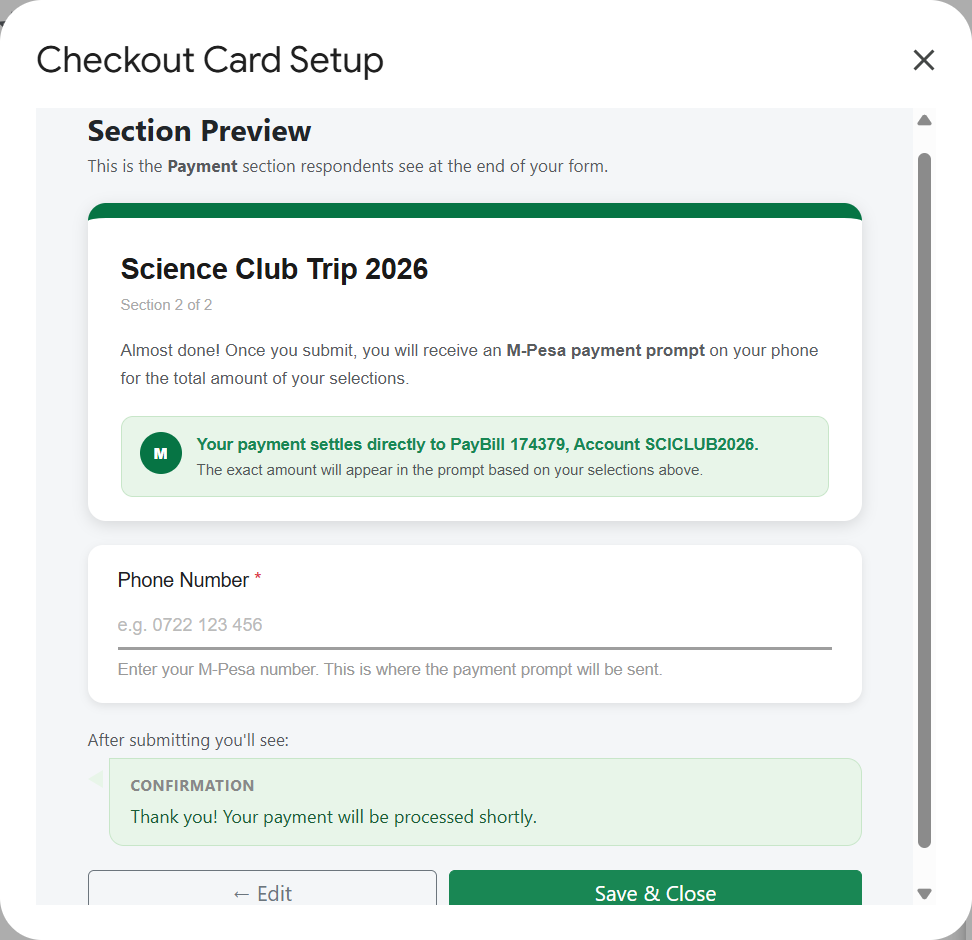
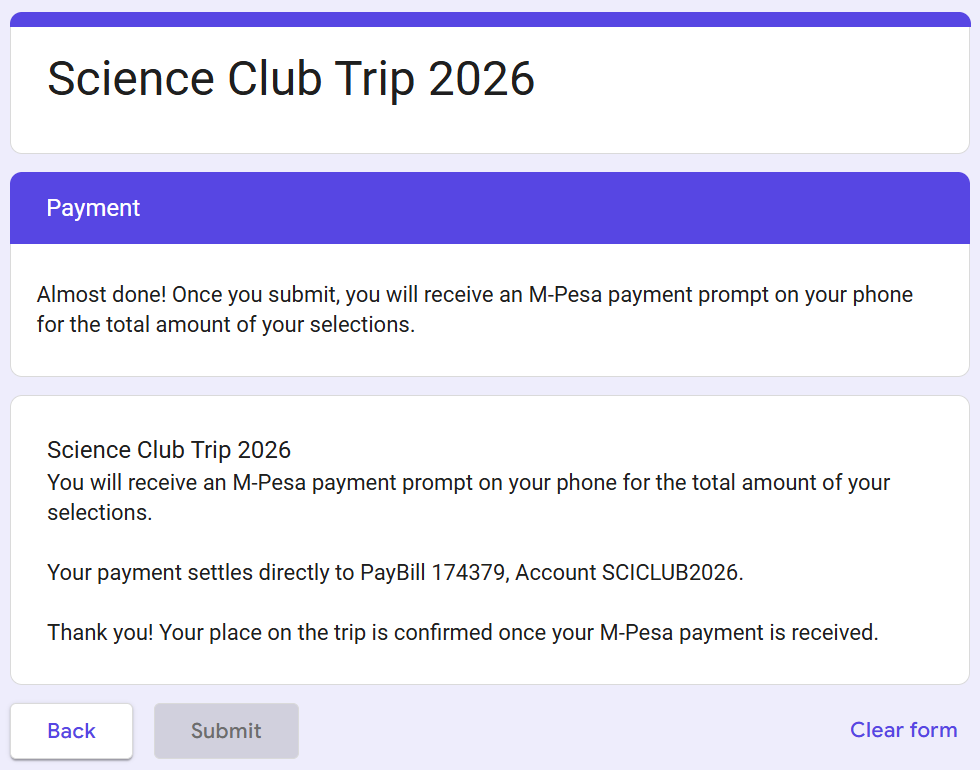
Put the price in the answers people choose from, written like “Day trip — KSh 1,500”. Then click Set Up in the bridGe panel. bridGe ticks the questions that carry prices and adds a Payment section at the end of your form, which tells people they will get an M-Pesa prompt when they submit. Click Save & Close.
- Step 05
Turn on payments
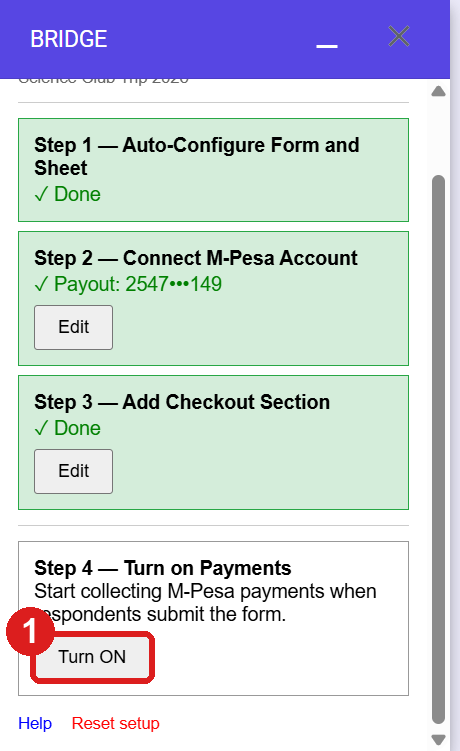
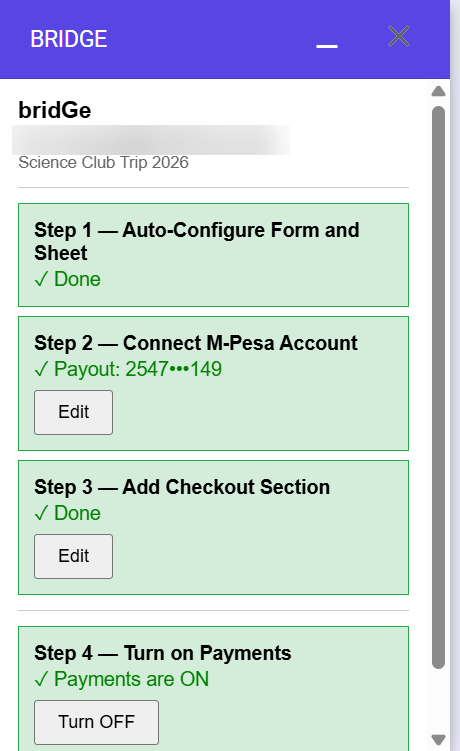
In the bridGe panel, click Turn ON under Turn on Payments. Until the panel says Payments are ON, submissions do not send an M-Pesa prompt.
- Step 06
Send yourself a test
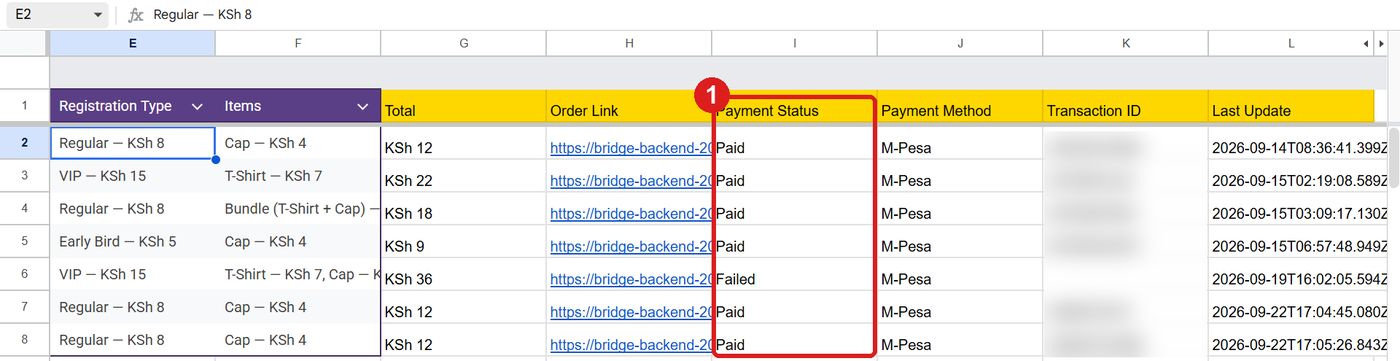
Fill in your own form with a small real payment, such as KSh 1, and approve the M-Pesa prompt on your phone. Then check the response sheet: Payment Status shows Paid, and Transaction ID shows the M-Pesa receipt.
- Step 07
Share your form
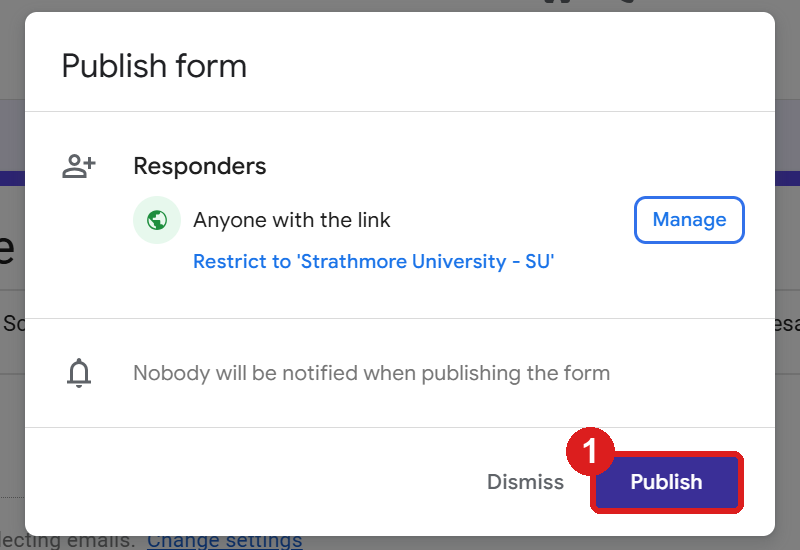
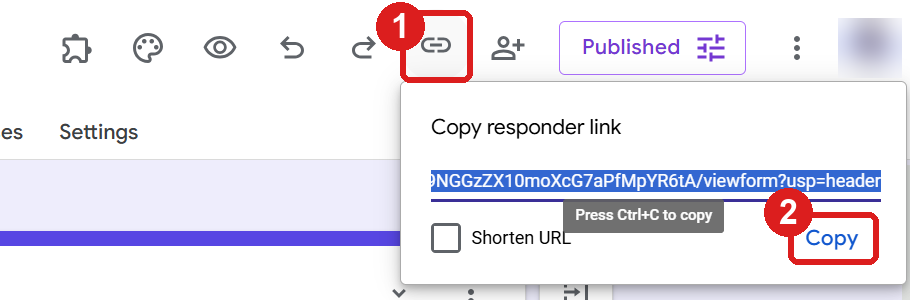
Click Publish, then use the link icon to copy your form link, and send it as you normally would. Every submission now asks for payment.
If something does not work
- No M-Pesa prompt arrived. Check that the phone number was filled in, in the 07XXXXXXXX format, and that the bridGe panel says Payments are ON for the form.
- The sheet did not change to Paid. Give it a minute: the status updates after M-Pesa confirms the payment. If it has been longer, email us the receipt number.
Still stuck: email info@itedasolutions.com with your form name.